
Yoga for Feet
by Ryvr
Practising the right yoga routine can strengthen, develop, stretch, and balance many different body areas. This article looks at how to use yoga to benefit your feet, which can help your whole body and being.
You can get a huge amount of benefit from spending time improving the muscles and flexibility of your feet. Strong and supple feet are a bio-mechanical miracle; the human foot contains 26 bones, 33 joints, and more than a hundred muscles, tendons, and ligaments. In top condition, they provide an excellent shock-absorbent and springy step, balance your body with stability, and make walking, running, and jumping motions easy and graceful.
Most modern westerners have lost much of the natural control and flexibility in their feet largely due to wearing shoes frequently. Shoes restrict motion and cause serious atrophy and imbalanced muscles. You will find it rewarding and healthy to walk barefoot whenever possible on a safe surface.
If you're considering the recently popular trend of barefoot running, or other exercise activities with bare feet, yoga poses like these can reduce injury risk for your feet and toes. Your whole body can benefit from the effects of barefoot foot yoga, which leads to a healthier base on the ground that can balance and improve all your movements.
We'll explore a full feet practice which stretches and improves strength and control of the feet muscles and connective tissue. This will work and stretch the soles, toes, and ankles of the feet.
1. Thunderbolt Pose (Vajrasana)
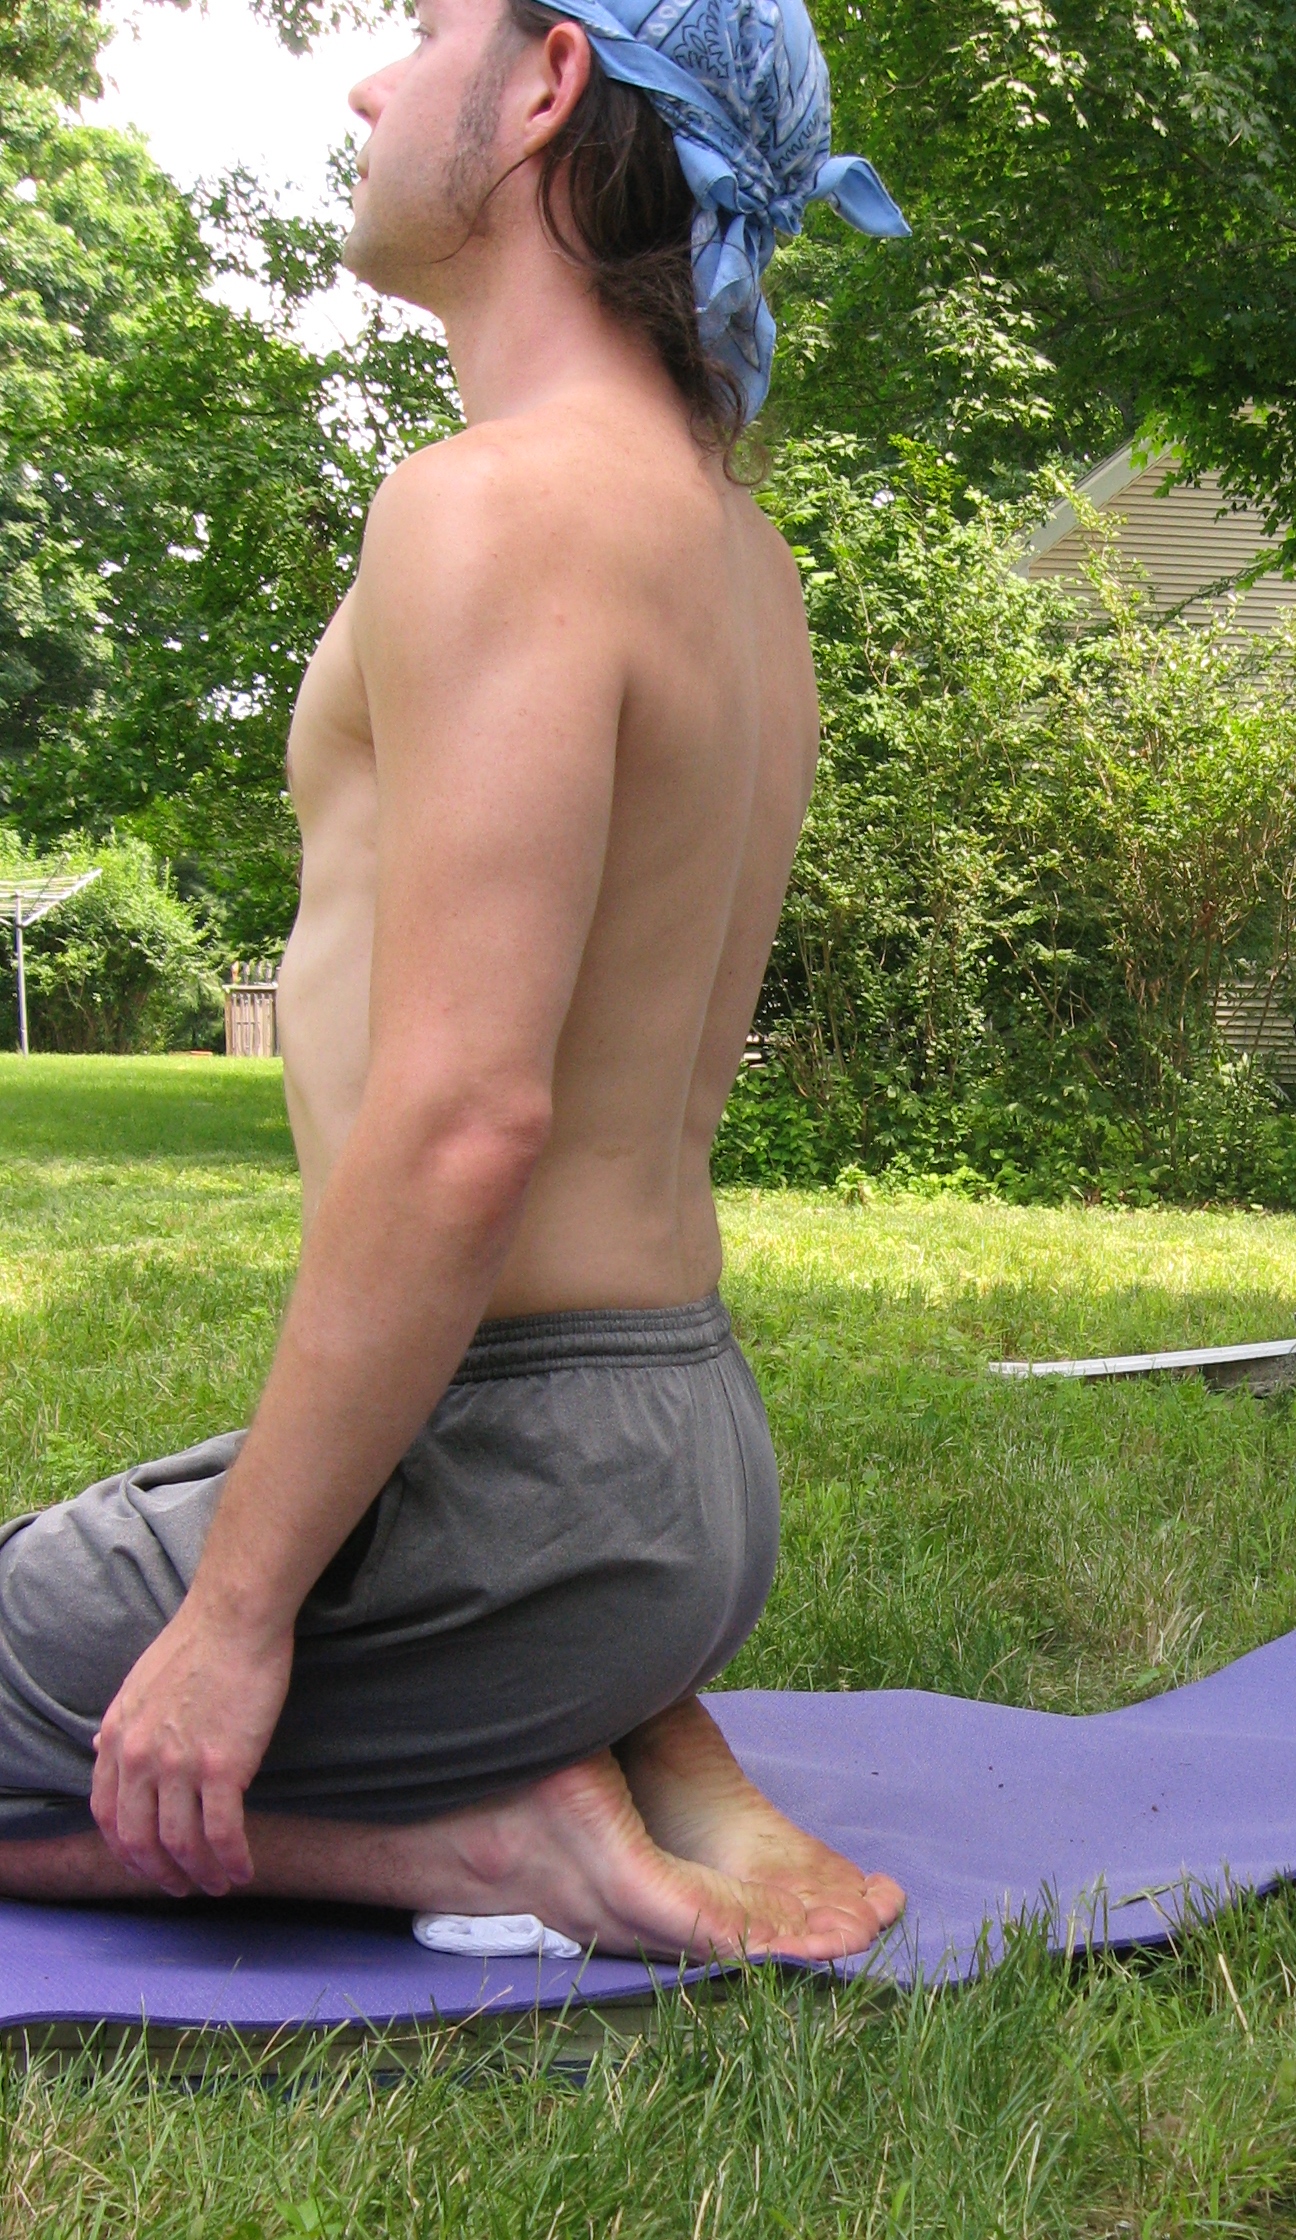
The first posture (asana) in our routine is Thunderbolt pose (Vajrasana). Here's how to do it:
- Kneel and sit back on your heels with the tops of your feet in contact with the floor. Your soles will stretch and curve into a good arch underneath you. Keep your big toes and heels together so there is no gap or space between the feet. If the front of your ankles are not flexible enough to rest comfortably on the floor without a space, use a small towel rolled into a tight tube shape to place underneath, and gradually use smaller cloths until you no longer need this prop.
- Sit with your back and spine straight but not tense. Let your spine lengthen upward without forcing it. Imagine a string attached to the top of your head up to a bunch of helium balloons. On your breath inhale relax and balance, then on the exhale allow your spine to lengthen and straighten, stretching gently upward.
- Aim to stay in this position for 5 minutes. If this is uncomfortable or you experience "pins and needles," you probably need a larger rolled towel beneath the front of your ankles.
2. Tucked Toe Stretch
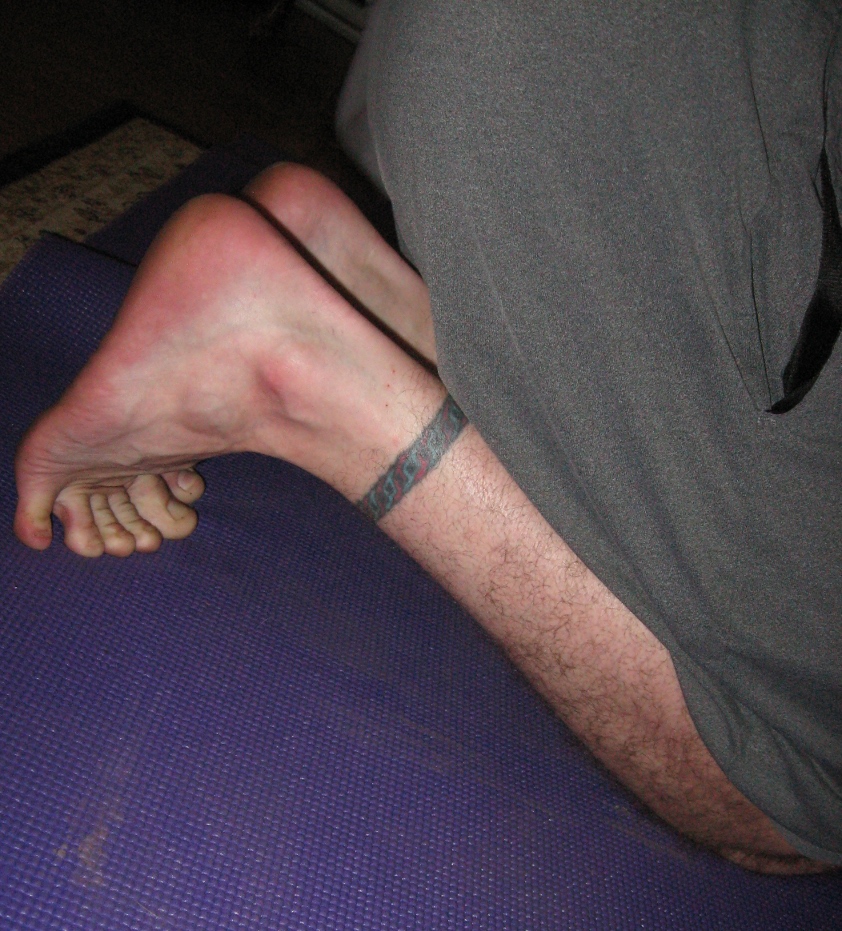
Next, from Thunderbolt, lean forward a little, keeping your spine long and lifting upwards.
- Now we are going to tuck the toes so that your soles raise facing directly behind you as your toes curl away from the soles. Lower your weight slowly and gently onto the length, not tips, of your toes. This will stretch the toes and soles. Avoid stretching too hard or releasing too much weight. Gradually, after practicing for a few weeks, gently increase the stretching in the toes and soles. Reduce the stretch at any feeling of strain or pain.
- Hold this stretch for 1-2 minutes.
3. Raise All Toes
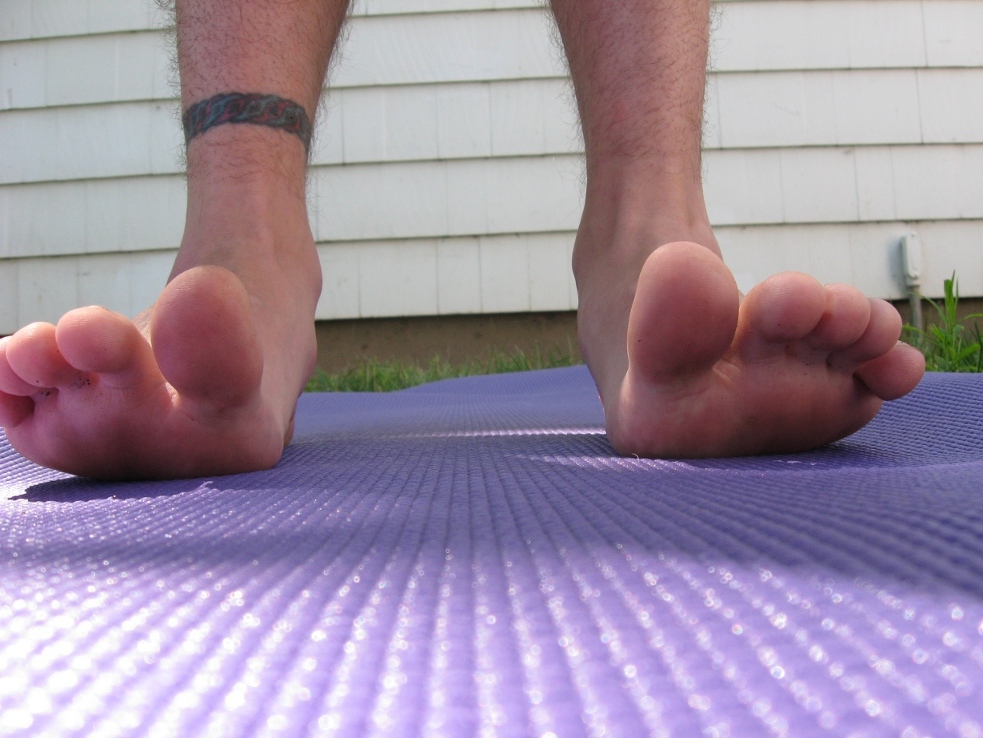
Walk around the room for a few seconds to relax the feet, then stand straight and still in Mountain pose (Tadasana). Keep your feet parallel and closer than shoulder width. Straighten your legs and allow your spine to lift and lengthen as before, feeling the gentle balloon pull upward from the imaginary string atop your head. Balance your weight evenly in the middle of your foot, evenly on both sides and distributed from front to back. Feel this balanced weight on your feet and allow your feet arches to raise if possible. Once your Mountain is stable and straight:
- With raised arches, lift all 5 toes of both feet upward, then lower them back down. Repeat this slowly 5-10 times.
4. Raise Big Toes
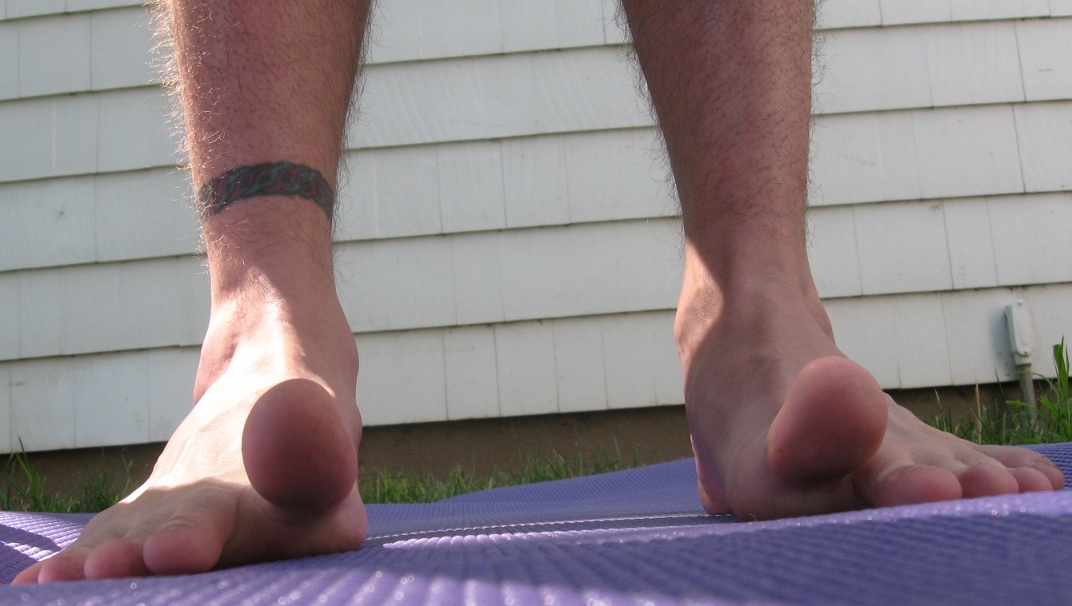
Return to your straight Mountain pose then:
- Just like before with raised arches, lift only both big toes, keeping the other four on the ground, then lower them back down. Repeat this slowly 5-10 times.
- This exercise and the next one require a gradual re-learning of lost muscle control. When you first try, you might not be able to move certain toes independently. Keeping your spine straight and long, you can bend your knees and bend down forward to use your fingers to help hold the other toes down while you are learning the new muscle control.
5. Raise Inner Toes
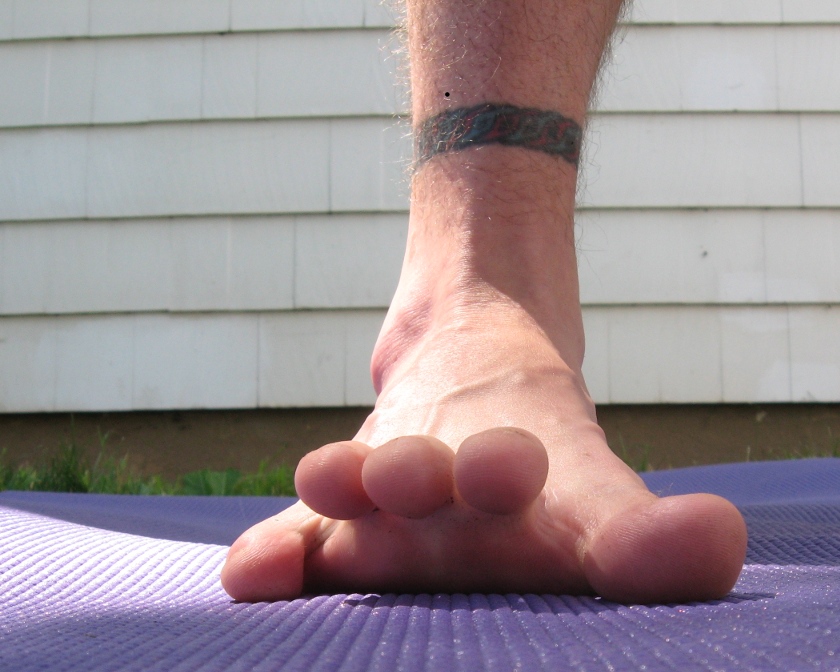
Again back to Mountain pose then:
- With raised arches, lift your inner three toes, keeping the big toe and littlest toe down on the ground, then lower them back down. Repeat this slowly 5-10 times.
Final tips and notes
- Practice this routine at least 4 times a week. Practising gently every day will bring the fastest improvement.
- Lose your shoes as often as possible. On a safe surface, walking barefoot is healthier for bare feet and toes, is safer, feels better, and looks better.
- Give yourself frequent foot massages or trade rubs with a partner. This can help circulation, release tension, and feels great.
- After a couple of weeks of practice, you'll probably notice your feet working, feeling, and looking better and better. Continue your practice to maintain your gains.